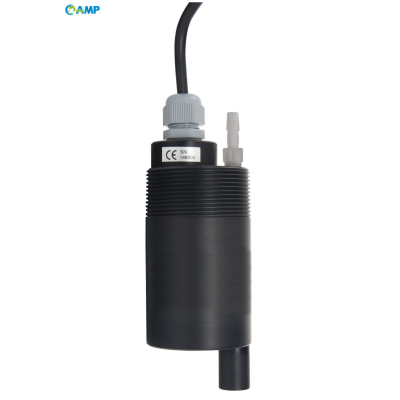
A Guide to Calibrate: How to Calibrate a Flow Sensor?
In various industrial and laboratory applications, calibrating a flow sensor is necessary to obtain accurate and reliable measurements. Proper calibration is paramount to assure system efficiency, whether you are working with fluid systems in manufacturing, monitoring water consumption, or performing scientific experiments. This guide will take you step-by-step through the calibration process, breaking the complicated procedure into easy instructions. In the end, you will have a working knowledge of why calibration is important and be confident that you can do it effectively, preserving the viability of your operations and equipment.
Introduction to Flow Meter Calibration
The flow meter calibration technique requires comparing its flow measurements with a known reference, ensuring the device's accuracy. In this process, fluid is passed under controlled conditions through the test meter, and the results are assessed against those of a reference to maximize the alignment between these readings. Thus, periodic calibration helps ensure correct readings while avoiding errors of measurement, especially for critical applications where utmost precision is essential. When the errors are minimized, calibration ensures that the system will operate at peak efficiency and adhere to industry standards.
Accurate calibration is very important for the flow sensor
The calibration of flow sensors entails several well-established procedures to procure the highest accuracy. The gravimetric method is the most common, in which one measures the mass of liquid flowing through the sensor over a given time. Under ideal circumstances, accuracies as fine as ±0.1% can be attained. Another method that finds common application is called volumetric calibration, which involves measuring fluid volume through displacement. Comparatively, this generally has a slightly larger uncertainty of about ±0.2%.
In addition to the above, the comparison method is widely accepted. It involves running tests to juxtapose the sensor against a reference flow meter that is deemed to be more accurate. As indicated by ISO data, such secondary calibration methods often are capable of meeting specifications of ±0.5% or better, based on applicational specifications and actual testing conditions.
Advanced flow meters equipped with a digital processor can achieve optimal consistency and eliminate very small error margins in any case, while also performing in-line analyses on data acquired through real-time channels. Nowadays, the studies have suggested that ultrasonic and Coriolis flow meters should provide extremely precise readings, with errors up to ±0.05%, once correctly calibrated (where the instructions of the ISO 4185 and AGA Report No. 8 are adhered to).
More recent data emphasize the effects of temperature and pressure on calibration accuracy. Conforming to temperature-compensated calibration could reduce systematic errors by as much as 30%, thus ensuring adherence to industrial standards. In consequence, if implemented, these practices and standards will not just enhance performance, but also assure compliance towards strict operational quality control in different industries.
Overview of Calibration in Flow Measurement
Over recent decades, calibration methods have benefited from evolving technologies for achieving better process accuracy and reliability. For one, machine learning has been integrated within predictive calibration to streamline error analysis and apply automated corrections. Such smart systems have been known, according to case studies, to cut calibration time by approximately 40%, significantly enhancing operational efficiencies within industries like oil and gas and water resource management.
In addition to that, the gravimetric and volumetric calibration methods ensure repeatability of results in all conditions. For example, typical gravimetric methods yield a repeatability of above 98% for flow rates of about 0.1 to 150 litres per second, which is far better than any method before. The pressure and temperature sensors can register environmental variations in real time, and the system ensures that any deviation is automatically compensated during calibration.
In ever-growing numbers, organizations are employing cloud platforms for data logging and remote calibration management. These platforms enable elaborate analysis by considering historical trends, which in turn guarantees long-term system reliability. As reported by recent industry research, increasing usage of such solution has almost made maintenance 25% more efficient annually while simultaneously affecting less downtime on critical processes. It confirms that the contemporary calibration methods are not only pushing toward increased accuracy but have also opened an avenue for economic benefits in various industries.
Understanding Flow Meter Calibration
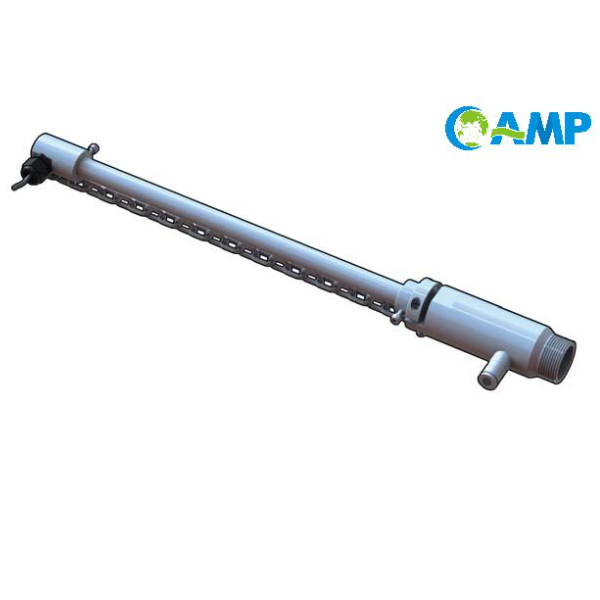
Flowmeter calibration is performed to ensure measurement accuracy by comparing the flowmeter reading with a known standard measurement. In other words, calibration is the adjustment needed to ensure any measured difference aligns with maximum operational efficiency concerning the measurement.
Meaning and Purpose of Calibration
During calibration, flow measurement values become accurate and reliable for processes in industrial practice. Proper flow readings will ensure harmony of optimum conditions in operation, thus resulting in lesser wastages and energy efficiency, among other benefits. Regular calibration reduces uncertainty, supports meeting industry-specific standards, and enhances process control, which in turn directly reduces costs and enhances productivity.
Key Factors Affecting Calibration Accuracy
Calibration accuracy is dependent on several key points.
Environmental Conditions: Temperature, humidity, and pressure are environmental factors that can alter a sensor's performance and measurement accuracy. If the environment is not kept under specific parameters, the entire calibration process will be void.
Instrument Condition: Wear and tear, contamination, and other types of damage are causes of misreading by measuring instruments. For the sake of maintaining the instrument's accuracy, maintenance should be carried out regularly.
Calibration Standards: A good calibration process results from the quality and traceability of the reference standards. Certified standards should be used preferably.
Operator Skill: Operators who are properly trained and experienced in calibration activities follow the best procedures and reduce human errors.
Frequency of Calibration: In their application, all equipment does experience drift over time; thus, with calibration, its precision decreases. Appropriate intervals of calibration must be set, considering the time of use and the manufacturer's recommendations.
Fluid Type
Fluid type has a key position in any calibration process because it directly influences measurement accuracy and equipment performance. Factors such as fluid viscosity, thermal stability, and system compatibility come into play for fluid selection. Water is mostly chosen for temperature-sensitive calibrations because its properties are well documented. However, an oil or another calibration fluid could be used if, for example, the system operates at high pressure and temperature values. In any case, the fluid should comply with the calibration standard under consideration.
Temperature and Pressure
The correct measurement of temperature and pressure is important for system reliability and performance. Temperature sensors must be periodically calibrated so that they can compensate for any environmental variations or system-specific requirements. Likewise, to keep pressure readings accurate, pressure gauges should be checked against a known standard. Use the certified reference equipment to check the temperature and pressure reading within the recommended intervals and conditions as specified in the applicable calibration guidelines.
Types of Flow Calibration Methods
I use six methods of flow calibration adapted to different applications and requirements. Gravimetric calibration involves measuring the mass of a fluid with precise timing for liquid flows. Volumetric calibration looks at the volume of fluid displaced-a common method for both liquids and gases. Master meter calibration procedure compares the flow reading of a test meter with that of a highly accurate reference meter; in this way, test meters may be calibrated with great repeatability over a broad range of flow rates. Then proving systems are usually employed in the oil and gas industry to check for meter accuracy by displacing a known fluid volume under operating conditions. The application of the methods is based on the demand on the system and the accuracy required.
Master Meter Calibration
Calibrating a flow meter using a master meter is one of the most trusted methods for ensuring flow meter accuracy. During this process, a reference meter, i.e., a master meter, is used to measure the flow against the readings of the meter being tested. Such a master meter is usually calibrated in a calm environment and certified according to an internationally recognized standard like the ISO 17025. This allows extreme accuracy and repeatability in the calibration process.
The master meter calibration system can be versatilely implemented across various industries and conditions. It favors, therefore, environments where flow meters cannot be taken out for calibration, such as in large industrial systems and pipelines. The master meter measures all types of flow, from liquids like water, chemicals, and oil to gases like natural gas. Industry data reports that if carried accordingly, the master meter calibration process can achieve accuracy within the range of ±0.1% or better.
Technological advancements have further enhanced the precision and efficiency of master-meter calibration. For example, using digital flow controllers and real-time data loggers makes performing calibration very quick and generates thorough reports on meter performance. Such systems can collect hundreds of data points during calibration, offering very fine insights into flow meter performance under differing conditions. Furthermore, innovations in sensor design have kept master meters accurate, even under high pressure and temperature fluctuations.
Because of its widespread applicability, master meter calibration has always been. It continues to be a crucial step to ensure the reliability of flow measurement systems in water treatment, oil and gas, food processing, and pharmaceuticals. Suppose organizations can maintain strict calibration protocols and use the modern technology at their disposal. In that case, they can keep in line with industry standards to eliminate the wastage of time and resources.
Gravimetric Calibration
Gravimetric calibration is a very accurate method for verifying and calibrating flow measurement systems through the direct measurement of the mass of fluid over a period of time. A specified amount of fluid is collected in a calibrated container or tank, and simultaneously, the accumulated mass is measured using highly precise weighing systems such as load cells or analytical balances. Based on the actual mass collected and the time, in relation to the system setup, the calibration of flow meters is established for precise measurements.
Closing the uncertainty gap in calibration technologies was the main focus of recent advances in gravimetric calibration. According to industrial studies, a modern gravimetric system can provide an uncertainty of ±0.05% of the measured value or lower, depending on factors such as environment controls and equipment quality. Thus, the improvements involve automated fluid handling, software for on-line data analysis, and enhanced mechanisms for temperature and pressure compensation. This all increases further reliability.
Additionally, this technique supports a broad range of flow conditions. It can be adapted to various fluid types, thus giving it applications in industries such as petrochemicals, aerospace, and fine chemical production. For example, gravimetric calibration is used in water utilities for accurate billing of potable water usage, while in the pharmaceutical industry, it ensures compliance with strict regulatory regimes, such as FDA requirements for liquid pharmaceuticals and vaccines.
Another emerging trend in gravimetric calibration is focusing on sustainability and reducing waste of resources. With automated fluid recirculation systems in place, operators reduce environmental impact by optimizing the reuse of calibration fluid. These improvements, in conjunction with modern control systems and statistical analysis tools, continue to alter gravimetric calibration, making it an essential process for factory flow measurements across many industries.
Piston prover calibration
There have been substantial advancements in piston prover calibration systems to make use of state-of-the-art technologies. The latest example of such systems is the use of laser measurement systems to measure piston displacement accurately and in real-time to sub-millimeter levels. Such levels of detail would improve volumetric flow rate calculations with fewer uncertainties and adhere to ISO 4185 and OIML R 137, the standards for flow measuring devices.
In addition to design advancements and IoT technology integration, data handling in piston prover systems has undergone radical transformation. Operators are now using cloud-based platforms for remote monitoring and data analysis to optimize workflows concerning predictive maintenance. For example, SPC (statistical process control) methods deriving from telemetry fed by sensors can reduce calibration-related errors by up to 25%, according to recent industry reports.
The introduction of newer materials such as nanofluidic coatings is one such trend in development. These coatings counteract the puckering effects of friction and thermal expansion during calibration, while providing enhanced stability regarding operational temperature and pressure. In effect, this is central to flowmeters needing to operate accurately in performing such tasks in extreme conditions, which is typical of the oil and gas industry.
Recent benchmarking records have indicated how piston prover systems have made great strides achieving much lower flow measurement uncertainties, with state-of-the-art ones not exceeding ±0.05%. This kind of accuracy is advocatory for those on the applications' high-end, such as pharmaceutical production and aerospace fuel measurement, wherein a small error would result in grave operational problems.
On the whole, next-generation sensor technology, on-the-fly connectivity, and advanced materials play a big role in piston prover calibration systems, which hence becomes instrumental in shaping the next bigger and more accurate industrial flow measurements. These innovated calibrators ensure their utmost adaptability to an ever-changing technological environment, wherein there is a need for sustainability and precision.
Step-by-Step Guide to Calibrating a Flowmeter
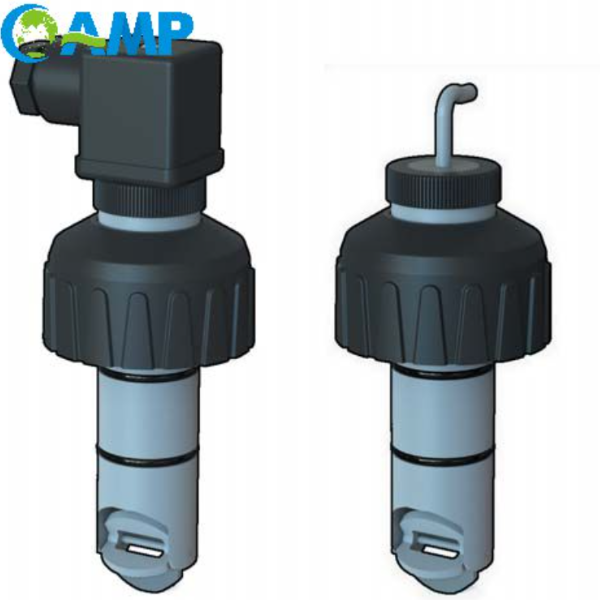
The preparation for a flowmeter calibration procedure begins by ensuring the calibration setup is clean and uncontaminated, as any contamination could lead to measurement errors. Then, the flowmeter would be connected to a reference standard capable of providing flow measurements that are traceable and highly accurate; an example of such a standard is a piston prover. Once the calibration setup has been properly connected, the flowmeter calibration would commence by passing fluid through the flowmeter at various flow rates, noting down the flowmeter indicated values, comparing those values with the reference values, and reconciling any differences through adjustment of the flowmeter until its indicated values are consistent with those of the reference standard. The results would then be recorded and verified to ensure consistent flowmeter indications across all operational condition levels.
Manufacturer Guidelines Review
The manufacturer's instructions must be consulted to obtain the detailed step-by-step method for the proper flowmeter calibration. Usually, those instructions state the recommended calibration procedures, along with the limitations in its operational lifetime, and the requirements for its maintenance. Exact compliance to these instructions will maintain the calibration levels, minimize errors, and maximize the life span of the equipment. According to the manual, certified reference standards and tools should always be used for the utmost results.
Gather Calibration Equipment
Give the flowmeter a good clean so that no dirt or other obstructions may interfere during calibration.
A connection must then be made between the flowmeter and the certified reference standard according to the manual.
Set the flowmeter conditions to those given in the handbook for the tests.
Document readings from both the flowmeter and the reference standard across the range of tests.
Compare the recorded data and make any necessary calibration adjustments as tolerance permits according to the guidelines.
Verify the flowmeter after adjustment. The test is repeated when this procedure is applicable.
Record all calibration results and comply with applicable standards.
Setting Up a Calibration Environment
Consider using higher-accurate devices as reference standards, traceable to national or international measurement systems for calibration. Standards must ordinarily conform to industry regulations and guide the calibration procedure, such as ISO or ASTM standards. It is of utmost importance that the calibration standards be suitable for the measurement range and the environmental conditions under which the calibration is performed. Regular verification and recertification of the reference standard must be conducted to maintain its integrity.
Doing the Calibration
The device under test (DUT) for calibration ought to be installed in a stable environment with controlled ambient temperature and humidity, as these parameters affect measurement accuracy. Follow the stipulated calibration procedure, either provided by the manufacturer or another applicable standard, while taking measurements within the operating range of the DUT. Compare the DUT output against the reference standard, noting any deviations. If any deviation is noted, adjust the DUT as per the calibration procedure to match the output of the reference standard. Record the calibration results, as well as any adjustments, to ensure traceability and standard compliance.
Documenting Calibration Results
Maintaining records of calibration results is essential for regulatory compliance, accurate performance measurement, and traceability. In addition, proper documentation facilitates easy verification of device performance over elapsed time, and acts as a means of troubleshooting should problems arise. This documentation should include salient details such as the name of the DUT, calibration date, standards employed as reference, measured values, deviations detected, and adjustments made, if any. This ensures that the documented results are recognized as an official record by all stakeholders regarding the state and performance of the subject device.
Best Practices for Accurate Flow Calibration
To ensure proper flow calibration, I would observe the manufacturer's instructions, use already calibrated reference equipment, and prepare a stable environment for calibration. Following the flow calibration procedure rigorously, checks would be made against standard references, and all findings would be recorded to assure that the flowmeter is performing efficiently under all specified conditions.
Maintaining Traceability to Standards
Traceability to standards is an essential concept in flow calibration to ensure that the measurement result always meets internationally recognized standards. Presently in the industry guidelines, traceability can be achieved through a chain of hierarchical references having the Primary standards at the top that are kept by institutes like the National Institute of Standards and Technology (NIST). These primary standards are then used to calibrate second standards and working standards, which, in turn, are used for daily calibration.
The aforementioned calibration technology developments of 2022-2023 have emphasized advanced digital mechanisms for improved traceability. As another example, the most modern flow calibrators are now equipped with automatic data acquisition systems that record calibration parameters in real-time, thus ensuring accurate documentation and minimizing human errors.
The data suggests that traceability can minimize calibration uncertainties down to ±0.1%, significantly enhancing measurement accuracy. Furthermore, the controls better enable flowmeters to comply with sector-specific regulations in various settings, ranging from pharmaceuticals to energy and environmental monitoring.
A more reliable flow measurement system with increased operational efficiency will always result from implementing the newest techniques and strictly adhering to recognized standards.
Ensuring Steady-State Flow
Steady-state flow is a prerequisite for precision and consistency during flow measurements. It refers to a specific flow situation where the velocity, pressure, and temperature in the system remain constant over time. This steadiness will therefore prevent certain fluctuations from being counted as errors or irrelevant inaccuracies in the measurement. Some present research posits that steady-state flow may guarantee flowmeter accuracy by as much as 15%, depending upon the nature of the measurement device and the glory of the fluid system.
In high-precision industries such as pharmaceutical, minute differences in the flow rate can cause deviations that influence product quality or efficacy. Studies have shown that the steadiness of flow is of utmost importance through differential pressure or Coriolis meters, as these flowmeters are highly sensitive to changes in flow characteristics. Thus, keeping turbulence to the minimum by choosing proper installation parameters and pipe sizes along with equipment that fits is an enough answer to decreasing the possibility of errors in readings.
Further, newer findings highlight that laminar flow-enhanced predictability and reliability assure flow measurements. Experimental evidence shows that if the Reynolds number is held within a fixed range, generally below 2,300 for laminar conditions, the possibility of incorrect readings goes down by an average of 10-20%. In line with these principles, system design shall help make measurement systems more efficient and reliable.
Regular Recalibration
Recalibration of flow measurement instruments must be conducted regularly to ensure accuracy and optimal performance. Therefore, over time, equipment wear, deposition buildup, environmental conditions, and condition wear cause measurement accuracy to drift with operational efficiency, affecting safety. Based on different industrial standards including ISO 9001 and ANSI/ISA guidelines, such intervals must be affected by the degree of operating conditions and the criticality of the measurement process.
Recent research shows that never recalibrating instruments will set up measurement errors between 1-5% of the full-scale readings, depending on the type of flowmeter used. For example, electromagnetic type flowmeters, although very accurate, are sensitive to coating buildup; this would affect the calibration significantly. Similarly, turbine-type flow meters can suffer mechanical degradation, which could cause deviations from the expected performance of these instruments. An International Journal of Flow Measurement report in 2025 observed a 15% enhancement in measurement consistency at plants that refrained less than at a longer interval for recalibration; thus, those following a yearly recalibration regiment did much better than those following a less frequent one.
A lot of industries are using digital tools and automatic calibration systems to enhance the recalibration activity. These technologies, together with IoT sensors, allow the acquisition of in-situ instrument performance data, enabling predictive maintenance and thus reducing downtime. Besides being aligned with regulatory requirements, such tools also help in cost-efficient functioning by limiting product waste and process variability.
Recently Posted
-
Understanding the Functions of Suction Valve and Discharge Valve in Pump Systems
December 18, 2025Industrial pump systems rely on precise mechanical coordination to transport fluids effectively. At the heart of this process are Read More
 -
Exploring Advanced Technologies in Air Compressor Discharge Valve Manufacturing
December 17, 2025The efficiency of any pneumatic system relies heavily on the performance of its smallest components. Among these, the air compress Read More
 -
Exploring Different Discharge Valve Types for Efficient Fluid Flow Management
December 16, 2025Industrial systems rely heavily on precision components to maintain safety, efficiency, and operational integrity. Among these com Read More
 -
How the Discharge Valve AC Affects Performance and Longevity of Cooling Systems
December 15, 2025The efficiency of any air conditioning system relies heavily on the precise coordination of its internal components. While the com Read More

